Redux sounds like some new cool technology but in fact it is more of a convention in how our frontend apps consume data.
Main
idea is to store every piece of data in centralized container and
change it only using set of predefined actions (something like
dispatching an event). This way data flows in only one direction and
chances of breaking something are reduced.
Why Redux in Angular project?
I
started using this approach while I was developing one huge HTML5
banner creation software and ad serving network. There were so many
components and services inside that Angular project and bits of data
were scattered all over the place.
I knew there has to be some better way to store data and soon I discovered ngrx/store project. From their GitHub repository:
RxJS powered state management for Angular applications, inspired by Redux
They
also offer many free tools, I mostly use their DevTools for Google
Chrome. It shows current state of store as well as detailed timeline of
dispatched actions and store modifications.
Redux DevTools
From
above image you can see how easy it is to look for certain changes or
store variables, much easier than any other way of handling data in
Angular.
Installation
I am using angular-cli for my projects and thanks to it I don’t have to think about SystemJS and loading 3rd party packages.
npm install @ngrx/core @ngrx/store --save
For DevTools package:
npm install @ngrx/store-devtools --save
I will import ngrx module into app.module.ts component and DevTools module:
Everything is clear from above steps, only new term is reducer.
Reducers
In terms of ngrx/store package, reducers are list of possible actions (in this case pure functions) for each property defined in the store. I am coming from PHP/Laravel background, so most similar to reducers are Event Listeners or Command Handlers.
Usual actions for each resource are CREATE, UPDATE and DELETE.
Reducers are way of changing data in the store, but we still need some way to read that data.
That is done using application store, centralized place where all of store properties are kept. In terms of TypeScript that is a simple interface with dedicated properties for each store and type of each property is actual model which is used.
I am storing app.store.ts file in root folder of my application, on same level as app.module.ts
import { Campaign } from './_models/campaign';
export interface AppStore {
    campaigns: Campaign[];
    // other properties...
}
Service for manipulating AppStore
I created simple convention for my Angular projects, it says:
Angular services communicate with AppStore in both ways. They dispatch actions and they read data from the store.
This way components only need to inject service instance and when something changes it is usually easily changed on only one place, the service.
import { Injectable } from '@angular/core';
import { Response, Http } from '@angular/http';
import { Observable } from 'rxjs/Observable';
import { Store } from '@ngrx/store';
import { Campaign } from '../_models/campaign';
import { BaseService } from '../_services/base.service';
import { HttpService } from '../core/http.service';
export class CampaignService extends BaseService {
    // Redux based variables
    campaigns: Observable>;
constructor(
        private http: HttpService,
        private store: Store
        ) {
            super();
            this.campaigns = store.select( store => store.campaigns);
        }
//...
Focus your attention on the constructor of CampaignService class. You can see I am using DI to create AppStore instance, and in the definition of the constructor I am selecting campaign store and assigning it’s value to campaigns property.
Store returns observable, so we can subscribe in our components and listen for changes, which is a big plus.
Using the service
I will skip import part of the component and class definition, I’ll just show most important parts of CampaignComponent here:
In the constructor of this component I am injecting CampaignService instance, after that I am creating link between CampaignService property campaigns and components property campaigns.
This allows me to directly use campaigns in component, I can print them using async pipe or I subscribe for changes as I did in this example.
In ngOnDestroy method I am removing subscription, this is important for preventing memory leaks, I won’t go into details, it is good to accept this practice as convention.
Loading data via REST
You may noticed call to loadCampaigns method in CampaignComponent, that method is actually contacting backend and loading data into Redux store.
Cause I am using observables when new data is loaded in the store, my components will immediately be updated with new content.
In loadCampaigns I am using custom http class which extends angular/http class. That way I can pass authentication headers into every request and manage error/status handling on one place. I described my custom http service here.
Cause authentication is different topic let’s imagine that http is angular class and that this route is unprotected.
First map statement accepts backend response, encodes it in JSON and passes data property if it exists or empty object if not.
Second map statement takes content of data property and creates array of Campaign objects. After that it returns simple object with defined action type and payload.
Finally subscribe statement takes passed action and dispatches it to Redux reducer.
That’s all.
Redux in Angular equals simplicity
At first it may look like overkill, defining reducer for each resource, inserting that reducer into StoreModule, adding new property into AppStore, injecting AppStore into service, … returning observables from the store, but when you get used to it, it starts to make sense.
Let us imagine simple app.component.html file which only prints list of campaigns:
{{campaign.name}}
As soon as loadCampaigns method returns response, this list will be updated. And not only that list, any other service/component which uses same store will be updated.
Lazy loaded modules
When you create lazy loaded module or complicated routing module with many levels of lazy loaded modules it becomes too complicated to track which instance of service is used in which module.
This same campaignService without Redux could return different data in 2 modules, because it’s using new instance.
With centralized store you don’t care is it same service instance or not, cause store is always the same and service is only accessing data inside the store.
I don’t recommend intentionally creating many instances of same service (service should be singleton) but sometimes you just can’t complete the task without it.
Live Demo and Source code
I’ve been asked about code for this tutorial so I created GitHub repository with entire code and few extras.
I also created Live demo and deployed it on GitHub Pages.
Live Demo Screenshot
I didn’t remove DevTools module from the deploy, so you will be able to track store changes if you install DevTools Crhome extension.
Closing
I am pretty new to Angular 2, I guess it couldn’t be different :) and many concepts were new to me. What I liked about it is TypeScript and strong conventions introduced.
On small projects these conventions are too much, but for any larger project they are welcomed.
I would like to hear how you complete similar tasks in your own projects, do you use Redux? What about requests to backend?
The
concept of Single Page Web Applications is great for building modern
web-based applications. However as more and more applications are being
transferred into the browser the complexity and the amount of data which
needs to be managed is consistently growing.
Many
modern web frameworks, like Angular, are using a component-based
approach to divide the application into smaller units. This approach is
great because using components helps to better structure your project,
keep the overview and make code reusable.
Implementing
a component in Angular 4 means that the component is also managing it’s
own state (it’s own data). E.g. if a component wants to display data
from a service, corresponding service methods are called and the
returned data is stored in properties of the component class. In the
component template you can then access and embed those properties, so
that the property values are displayed in the HTML output.
As
the complexity of your application is increasing you’ll be using more
and more components and data which must be shared across components is
passed down the component tree, so that the state of every component is
always updated with the relevant data.
This
approach is feasible if you’re working with just a very few components.
However, if the number of components in your application is increasing
this way of managing state becomes cumbersome and error-prone.
The shortcomings are as follows:
Usage
of input properties for passing data down the component tree: In order
to pass from one component to another, we’ve to use input properties to
pass data down the component tree. This means that data needs to be
passed to components in between as well. These components do not make
use of this data, so this approach is inefficient.
Defining
lots of input properties to pass data between components, makes
components inflexible. Because components rely on those input
properties, they cannot be reused somewhere else.
If the state is changed within one component you need to notify all other components which makes use of the same data manually.
All
these shortcomings can lead to a complex application architecture and
lead to inconsistent state information accross your components.
To
solve that problem we need to establish a new way of managing state in
our application. This is where Redux comes in. Redux is a predictable
state container for JavaScript apps which makes it possible to use a
centralized state management in your application. So what exactly is
meant by state and centralized state management? Simply, you can think
of state as just data you use in your application. So a centralized
state is just data you’re using by more than one component (application
level state).
In
the following you’ll get an overview of Redux building blocks and learn
to apply Redux in your Angular application by building a sample
application step-by-step.
Building Blocks of Redux
The Redux website can be found at http://redux.js.org/.
Redux can be used with any modern JavaScript-based web frameworks.
Before starting to build our Angular Redux sample application let’s
first clarify the core concept of Redux.
Redux
organizes your application state in the store, a single data structure
in your application. The components of your application read the state
of the application from the store. The store is never mutated directly.
Instead a action is dispatched to a reducer function. The reducer
function creates a new application state by combining the old state and
the mutations defined by the action.
Let’s explore the building blocks of Redux one by one:
Store
The
store is a single JS object. To create a store you simple need to a add
a TypeScript file to the project and declare a new interface type which
contains all the properties you’d like to keep in the store.
Actions
Actions are plain JS objects that represent something that has happened. Can be compared to events.
Reducers
A reducer is a function that specifies how the state changes in response to an action.
What’s
important to understand is the fact that a reducer function does not
modify the state. It always returns a new state object with the
modifications included.
A
reducer function must always be a pure function. That means that the
function must ensure that if the same input is given always the same
output is produced.
E.g. take a look at the following reducer function which takes the old state and increments the state property count.
Now that you have a basic understanding of Redux, let’s start with the second part of this tutorial and create a new Angular 4 application with Redux from scratch.
To initiate a new Angular 4 project we can use Angular CLI:
$ ng new angularedux-todo
This creates a new folder angularredux-todo and within that folder you can find the initial Angular starter project. The live-reloading development web server is started by using the following command in this directory:
$ ng serve
Installation Redux for Angular
Next we need to add Redux to our project. There are many Angular specific implementations of Redux available. For the following demo we’ll use the NPM package:
@angular-redux/store
@angular-redux/store relies on the redux package itself, so we need to install both packages
$ npm install redux @angular-redux/store —save
What We’re Going To Build
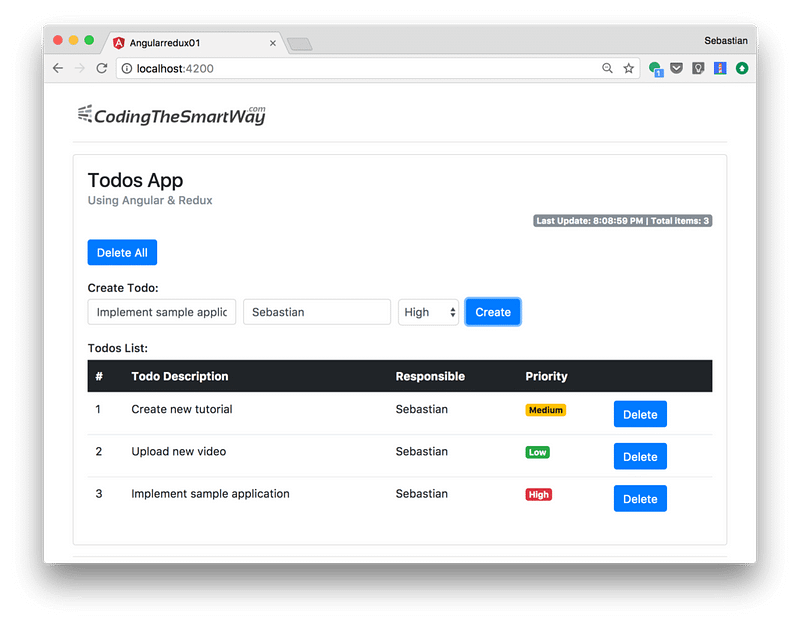
Let’s take a look at the application we’re going to build in the next steps:
The application we’re going to build is a simple Todo manager application. The application will consists of two Components:
Todo-Overview: This component contains status information like last update and total items. Furthermore this components contains the button “Delete all” to clear to list of todos.
Todo-List: The todo-list component contains the input form elements to enter a new todo and the table output of all todo elements.
The todo items will be managed centrally by a Redux store, so that both components must interact with this store to access and manage the todo data.
Implementing Store, Actions and Reducer
Now, let’s implemented a basic store and a basic reducer function by creating the file store.ts in the project folder src/app and insert the following piece of code.
export interface IAppState {
}
export function rootReducer(state, action) {
    return state;
}
The store is implemented by introducing the IAppState interface type. In this first step the interface is empty so the store does not have any properties. The reducer function is called rootReducer. As every reducer function rootReducer takes two parameters: state and action. The state is the previous state of the application and action is an object describing the change which has been dispatched. At the moment the rootReducer is simply returning the original state, so no changes are made.
Now let’s add the properties to the IAppState interface:
todos as an array of type ITodo to contain all of our todo items
lastUpdate as Date type to contain the information when the todos array has been updated
At the same time we’re defining the INITIAL_STATE object of type IAppState. INITIAL_STATE is implementing the interface IAppState and initializing the properties todos with an empty array and lastUpdate with null. INITIAL_STATE will be used later on, when setting up the store of our application.
Next we need to implement the ITodo interface. Create the new file src/app/todo.ts and insert the following implementation:
Now let’s activate the store for our application. First add the following import statement to the top of app.module.ts:
import { NgRedux, NgReduxModule } from '@angular-redux/store';
Next, add NgReduxModule to the imports array of @NgModule as well.
We need to add one further import statement to import IAppState, rootReducer and INITIAL_STATE from store.ts:
import { IAppState, rootReducer, INITIAL_STATE } from './store';
The activation of the store is done by adding a constructor to the AppModule class, injecting NgRedux into that constructor and then calling the configureStore method of the NgRedux service:
The configureStore method takes two parameter. As the first parameter we’re passing in our reducer function rootReducer. The second parameter is an object containing the initial state of the store. In our case we’ve defined INITIAL_STATE already so that we can pass in that object here.
Defining Action Types
The reducer function should be able to handle all action types which are used in our application. Each action type is identified by a string. Create a new file src/app/actions.ts and define the following four action types:
Having defined action type constants makes it easier to deal with action types in the reducer function. In store.ts add the following import statement first:
import { ADD_TODO, TOGGLE_TODO, REMOVE_TODO, REMOVE_ALL_TODOS } from './actions';
Finish the implementation of the the reducer function in store.ts and make use of the action types as you can see in the following:
export function rootReducer(state: IAppState, action): IAppState {
    switch (action.type) {
        case ADD_TODO:
            action.todo.id = state.todos.length + 1;
            return Object.assign({}, state, {
                todos: state.todos.concat(Object.assign({}, action.todo)),
                lastUpdate: new Date()
            })

        case TOGGLE_TODO:
            var todo = state.todos.find(t => t.id === action.id);
            var index = state.todos.indexOf(todo);
            return Object.assign({}, state, {
                todos: [
                    ...state.todos.slice(0, index),
                    Object.assign({}, todo, {isCompleted: !todo.isCompleted}),
                    ...state.todos.slice(index+1)
                ],
                lastUpdate: new Date()
            })
        case REMOVE_TODO:
            return Object.assign({}, state, {
                todos: state.todos.filter(t => t.id !== action.id),
                lastUpdate: new Date()
            })
        case REMOVE_ALL_TODOS:
            return Object.assign({}, state, {
                todos: [],
                lastUpdate: new Date()
            })
    }
    return state;
}
Let’s explore the reducer function step by step.
First you may notice that a switch statement has been added for action.type. Action type contains the action string, so that the case statements can make use of the previously defined action constants:
ADD_TODO: The ADD_TODO case uses the new todo object which is available in action.todo and creates a new state object in which the todos array is extended with that new todo element. To create a new state object the Object.assign method is used.
TOGGLE_TODO: The TOGGLE_TODO action is dispatched if the user wants to complete / uncomplete a todo entry. In that case the isCompleted property of the current todo element must be changed to the opposite. This means that a new state objects needs to be created and returned which contains this new value. The Object.assign method is used once again to compile this new state object.
REMOVE_TODO: With REMOVE_TODO an action is handled which is returning a new state where a specific todo entry has been removed from the previous state’s todos array.
REMOVE_ALL_TODOS: This actions returns a new state objects where the todos property is set to an empty array, so that all todo items are removed from the application state.
Implementing TodoOverviewComponent
Now that our application has implemented all relevant Redux building blocks we’re ready to implement the TodoOverviewComponent and the TodoListComponent. First let’s start with the Todo-Overview component. Use the following Angular CLI command to add that new component to the project:
$ ng g component todo-overview
The four new files are added to src/app/todo-overview:
todo-overview.component.css
todo-overview.component.html
todo-overview.component.spec.ts
todo-overview.component.ts
Open up file todo-overview.component.ts and change the default implementation to:
We’re adding a few import statements on top of the file. NgRedux and select is imported from the @angular-redux/store package. IAppState is imported from store.ts and the action type REMOVE_ALL_TODOS is imported from actions.ts.
Using dependency injection again the NgRedux service is injected into the class. The clearTodos method is implemented to dispatch the REMOVE_ALL_TODOS action type to the store. Dispatching is done by using the dispatch method of the NgRedux service.
Furthermore we need to access the state properties todos and lastUpdate. To define class properties which gives you access to the store properties we need to use the @select decorator.
Now we’re ready to implement the corresponding template in todo-overview.component.html:
Last Update: {{ (lastUpdate | async) | date:'mediumTime' }} | Total items: {{ (todos | async).length }}
Please note, that you need to use the async pipe to include store properties as an expression statement in your template code.
Implementing TodoListComponent
Our second component is the TodosListComponent and is added to the project by using the following command:
$ ng g component todo-list
As we need to implement the todo entry form as part of this component we need to add the Angular FormsModule to our application. Add the following import statement to file app.module.ts:
import { FormsModule } from '@angular/forms';
Add the FormsModule to the imports array as well.
Next, let’s change the default implementation of the component class in todos-list.component.ts to what you can see in the following code listing:
Here again the NgRedux service is injected in the class constructor, so that we’re able to dispatch actions to the store. The @select decorator is used to gain access to the todos properties from the store. todos is later used in the template code to output all todo items as a table.
Furthermore we’re defining a class member of type ITodo called model. This model object will be used to implement the todo form in the template and bind values of the input controls to the properties of this object.
The event handler methods onSubmit(), toggleTodo() and removeTodo() are implemented to dispatch the corresponding actions to the store.
Now let’s take a look at the template implementation in file todo-list.component.html:
Create Todo:
Todos List:
#
Todo Description
Responsible
Priority
{{ t.id }}
{{ t.description }}
{{ t.responsible }}
LowMediumHigh
This template contains the implementation of an Angular template-driven form which lets the user input new todo items. The form submit event is connected to the onSubmit event handler method, so that the ADD_TODO action type is dispatched to the store whenever a user submits the form.
The table output of the todos array is done by using the NgFor directive in the following form:
Again, it’s important to use the async pipe again to retrieve data from the store for usage in the template.
To complete a todo item in the table the user should be able to simply click on the element (either on ID, description or responsible). Because of that we’re connecting the toggleTodo event handler method with the click event of the elements which contains the text information in the table.
Finally the user should be able to delete a single todo item from the list. To do so a button is included for each row and the click event of that button is connected to the removeTodo event handler method.
Last but not least you can find the CSS code for class completed in the following listing. This code needs to be inserted into file todo-list.component.css:
.completed {
    text-decoration: line-through;
  }
By adding the following attribute to the elements which contains the text values of a todo item we’re applying that class only of the isCompleted property is set.
[class.completed]="t.isCompleted"
In that case the text is crossed out, so that the user can see that this item is completed.
Implementing AppComponent:
Finally we need to include both components in AppComponent by using the elements and .
While working on SharePoint 2013 and all deployments we had to do, I
could see a big need to get all PowerShell scripts into a repository, we
use Microsoft TFS.
But why only use it as respository for versioning control, why not also
let PowerShell/Orcestrator do a get latest, pack it in a SCCM package
for distribution to all needed servers?
And out came a very simple script that can do a "get latest" from TFS.
You need to have Visual Studio Team Explorer installed in order to use this script.
Create your own script and load this scrip in and execute with your needed parameters.
Enjoy!
if ((Get-PSSnapIn-NameMicrosoft.TeamFoundation.PowerShell-ErrorActionSilentlyContinue) -eq$null)
We use VSTS-based builds to build our projects and create artifacts
(e.g. web apps/services, binaries, etc.). We then make use of Octopus Deploy
to deploy our artifacts into our various environments (e.g.
development, test, production, etc.). Once these artifacts have been
deployed to the production environment, we’d like to keep them around
indefinitely.
As you are likely aware, VSTS has a default retention policy on
builds of 10 days with a maximum retention of 30 days. That is, unless
you manually switch the retention for a build to “Keep Forever”. This
can be accomplished easily within the VSTS web interface. However, we
would like to do this programmatically when Octopus has successfully
deployed a build to the Production environment. To do that, we plan to
create a PowerShell script to manage the API calls. What follows is an
example of how we might approach this task.
For this particular script, I will be relying on personal access tokens, or PAT’s to handle authentication with the VSTS REST APIs. For a quick refresher on PAT’s, check out Personal Access Tokens and VSTS APIs.
The first thing our script will do (I’ll show the full script at the end of this article) is create the Base64-encoded Basic authorization header necessary to authenticate with the API call.
In the above snippet, we have created a set of parameters, along with some default values, that can be passed in when calling this PowerShell script. The code at the bottom of the snippet is simply combining the user name and PAT (separated by a colon) and Base64-encoding it.
Next, we construct the URL to make the desired API call. In this case, we are calling the Build API with a query parameter buildNumber. Notice that buildNumber is one of the input parameters defined above. In our case, we track the build number in Octopus; However, we need the build ID to set the retention. The results of this API call will include the build ID that we need.
The above code is where all the magic happens. The PowerShell cmdlet, Invoke-RestMethod, sends an HTTP(S) request to a RESTful web service and returns the results. Here we’re passing in the URL to the API to be called, the method type (e.g. GET) and the authorization header (which includes our PAT). We store the results in the aptly named variable, $result.
if ($result.count -eq 0)
{
     throw "Unable to locate Build ID for Build Number $($buildNumber)"
}

$buildId = $result.value[0].id
One of the properties of $result is count. In our case, we only ever expect to get back 1 result. If we get back zero results then we throw an error indicating we couldn’t find the build number specified.
Assuming all went well, we then pull out the Build ID into the $buildId variable. The magic going on here is that PowerShell has automatically parsed the JSON results for us and provided properties allowing us to easily get at the elements we care about. In this case, I care about the id property so that’s all I pull out.
Next, we have to setup the second API call that takes the Build ID that we just obtained and used it to set the retention to “Keep Forever”. Notice that this second API call uses the PATCH method and also expects some JSON in the message Body.
Write-Output ("Retention set to '$($keepForever)' for Build ID $($buildId) (Build Number: $($buildNumber))")
For completeness, we’ll write out an informational message letting us know what happened.
When I run the script with the appropriate parameters, here is what I see:
Here’s the full PowerShell script in all it’s, well, glory…
Param(
   [string]$vstsAccount = "",
   [string]$projectName = "",
   [string]$buildNumber = "",
   [string]$keepForever = "true",
   [string]$user = "",
   [string]$token = ""
)

Write-Verbose "Parameter Values"
foreach($key in $PSBoundParameters.Keys)
{
     Write-Verbose ("  $($key)" + ' = ' + $PSBoundParameters[$key])
}

# Base64-encodes the Personal Access Token (PAT) appropriately
$base64AuthInfo = [Convert]::ToBase64String([Text.Encoding]::ASCII.GetBytes(("{0}:{1}" -f $user,$token)))

# Construct the REST URL to obtain Build ID
$uri = "https://$($vstsAccount).visualstudio.com/DefaultCollection/$($projectName)/_apis/build/builds?api-version=2.0&buildNumber=$($buildNumber)"

# Invoke the REST call and capture the results
$result = Invoke-RestMethod -Uri $uri -Method Get -ContentType "application/json" -Headers @{Authorization=("Basic {0}" -f $base64AuthInfo)}

# This call should only provide a single result; Capture the Build ID from the result
if ($result.count -eq 0)
{
     throw "Unable to locate Build ID for Build Number $($buildNumber)"
}

$buildId = $result.value[0].id

#
# Now, let's set the Retention to Keep Forever
#

# Construct the REST URL to set the retention
$uri = "https://$($vstsAccount).visualstudio.com/DefaultCollection/$($projectName)/_apis/build/builds/$($buildId)?api-version=2.0"

# This method requires "keepForever" to be set (and passed in via the message body)
$body = "{keepForever:$($keepForever)}"

# Invoke the REST call and capture the results (notice this uses the PATCH method)
$result = Invoke-RestMethod -Uri $uri -Method Patch -ContentType "application/json" -Headers @{Authorization=("Basic {0}" -f $base64AuthInfo)} -Body $body

Write-Output ("Retention set to '$($keepForever)' for Build ID $($buildId) (Build Number: $($buildNumber))")
While this is a relatively simple example it does show how to solve real-world problems. That said, there are improvements that can be made to this script. For example, if one of the API calls fail, you might want to log the details somewhere or you might want to handle the exceptions explicitly. In any case, I hope you find the example useful :-)
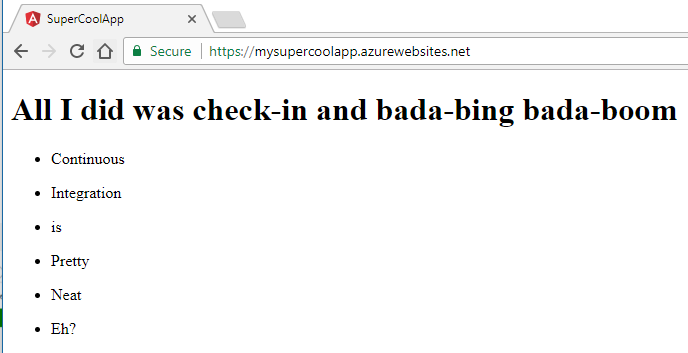
Let’s learn how to deploy the app we just built as an Azure Web App using Continuous Integration. The end goal is to be able to check in a change which will automatically trigger a build and publish the latest code to an Azure Web App.
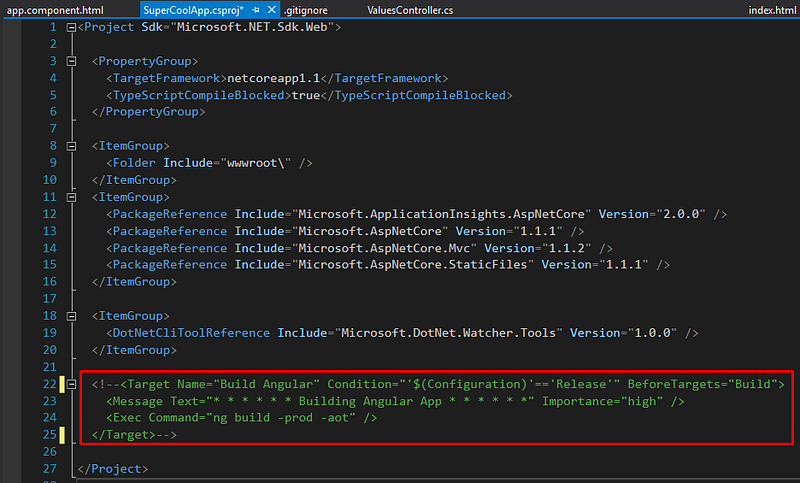
Remove the Angular build command from your *.csproj The angular app will eventually be compiled by a VSTS build agent in the cloud and it’ll handle compiling the Angular code
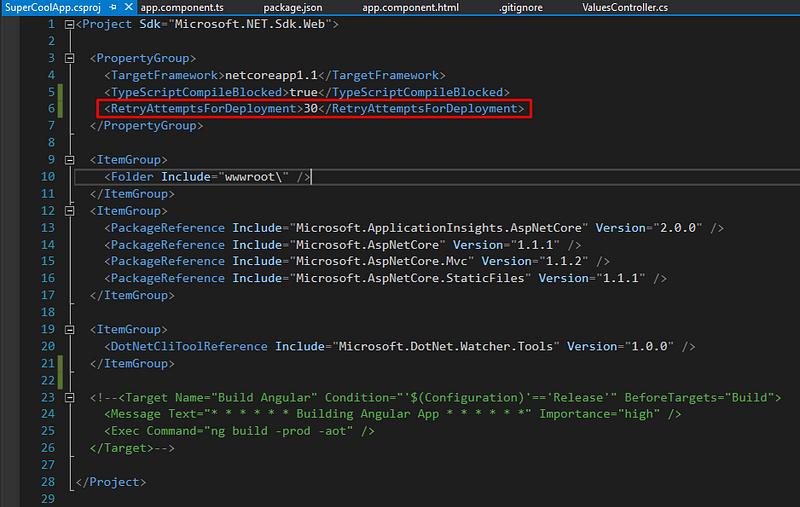
2. Set deployment retry attempts to 30 in your *.csproj
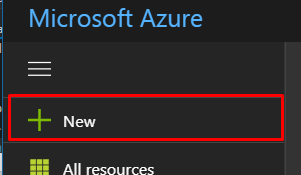
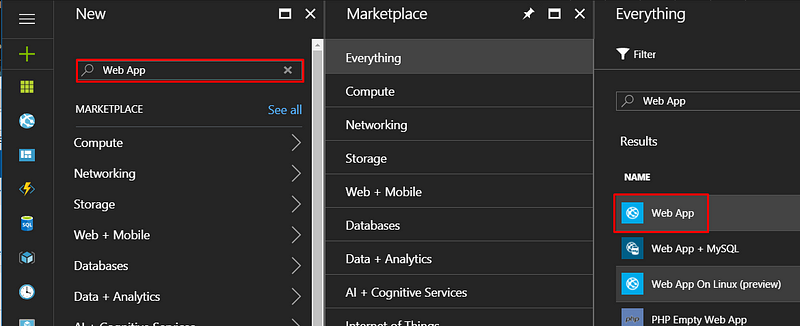
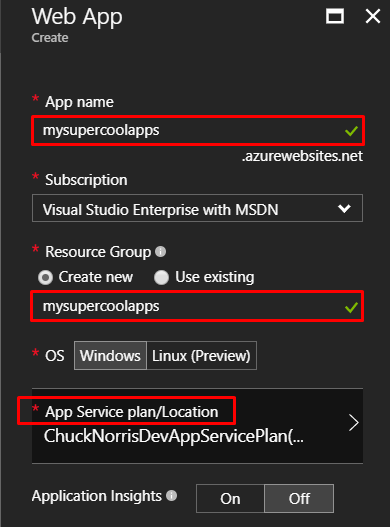
Set your name, create a resource group and create an appropriate App Service plan — The F1 (Free) pricing tier will work just fine, but don’t expect blazing fast load times — then create your web app.
Create a Visual Studio Team Services Project
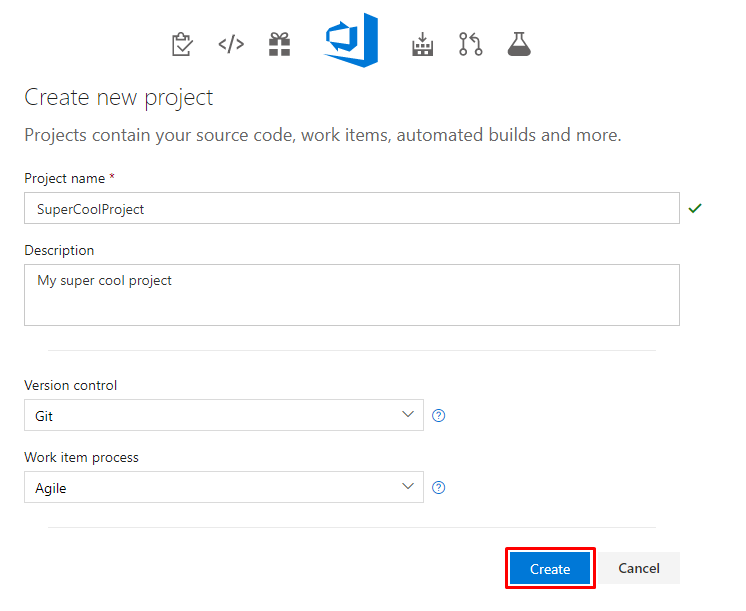
Navigate to the VSTS portal you setup when creating your VSTS account and create a new Project
Note: Version control and Work item process are only applicable if using VSTS to store your code and track your work items, but we’ll be using GitHub as our source repository instead so it doesn’t matter
Create a Build Definition to Deploy Your App
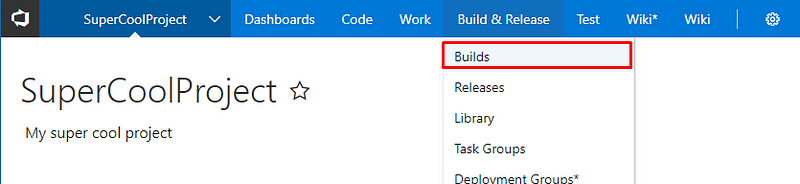
Navigate to your Builds section
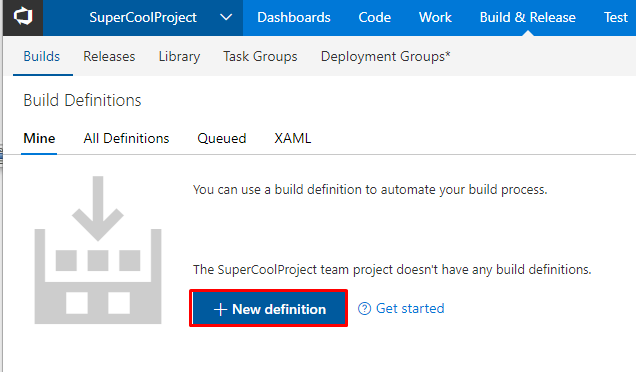
Create a new build definition
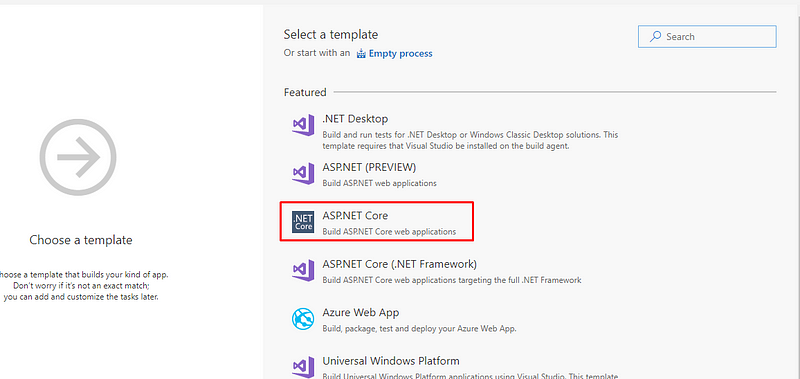
Select the ASP.NET Core template
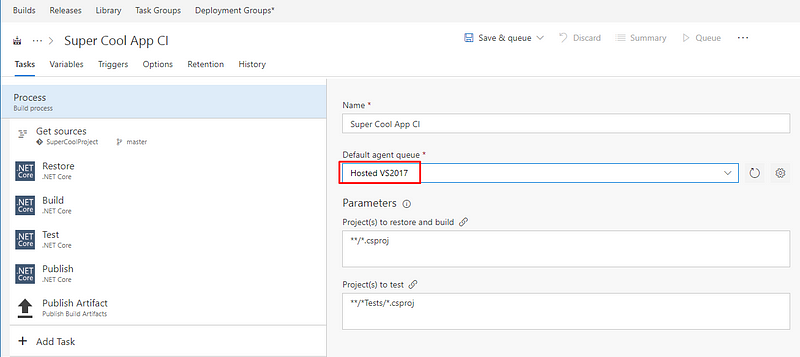
Set the Default agent queue to Hosted VS2017
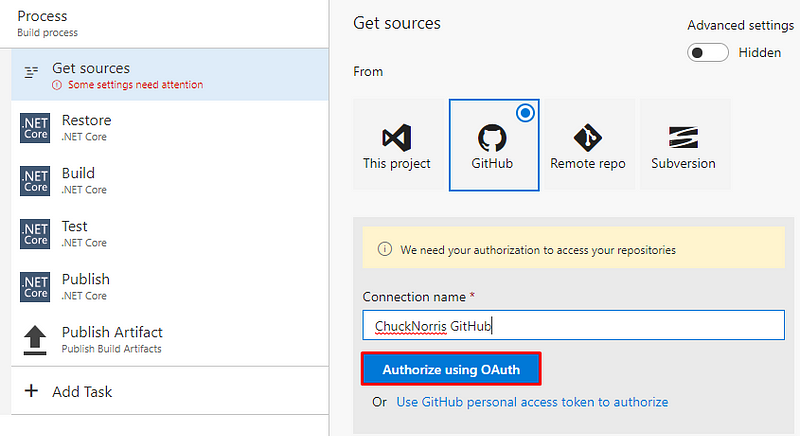
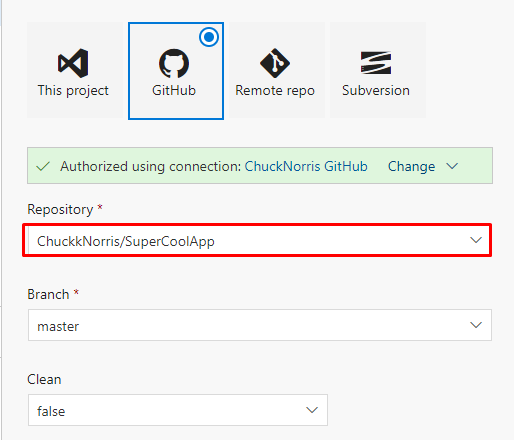
Set the package source to your GitHub repository
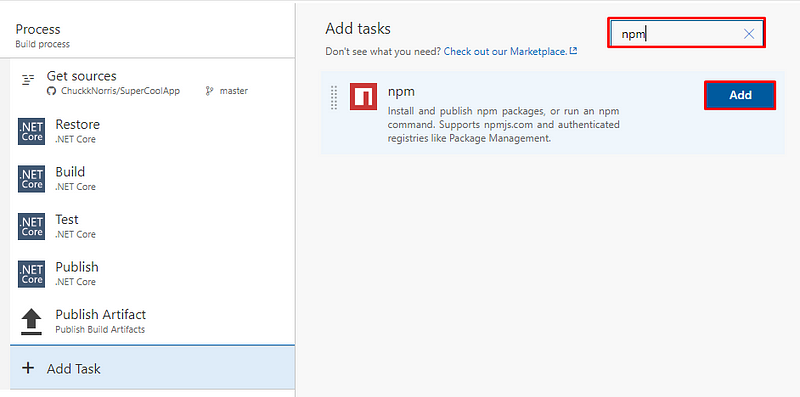
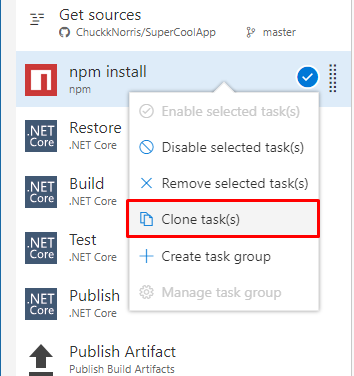
Add an npm task, move it to before the Restore task, and clone it
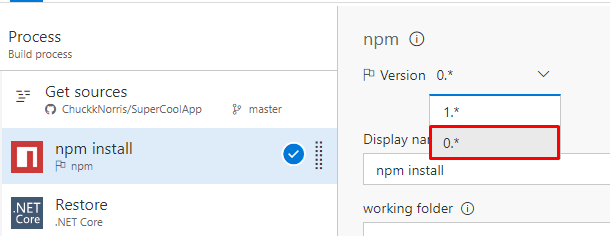
Set the npm task version to 0.*
Set the npm task version to 0.*
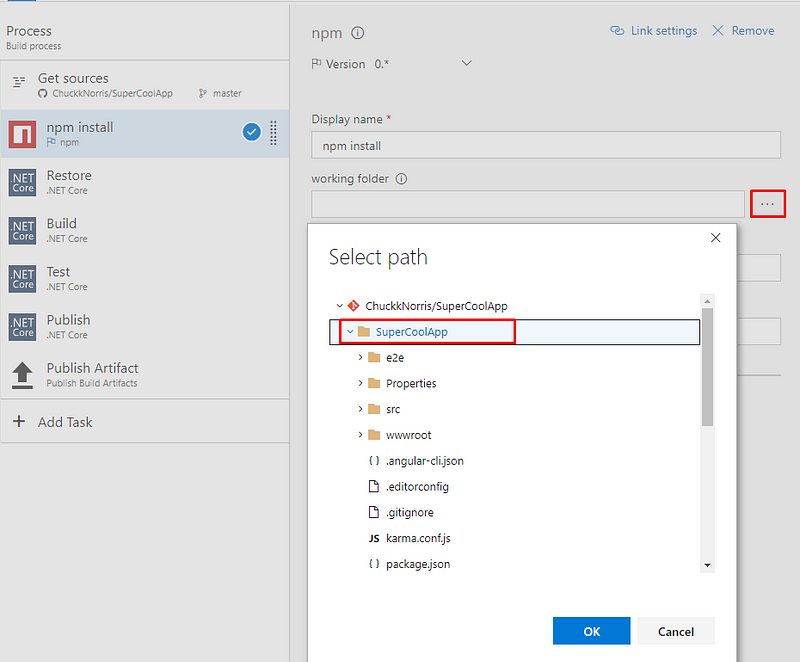
Set the working folder to where your project’s package.json is located
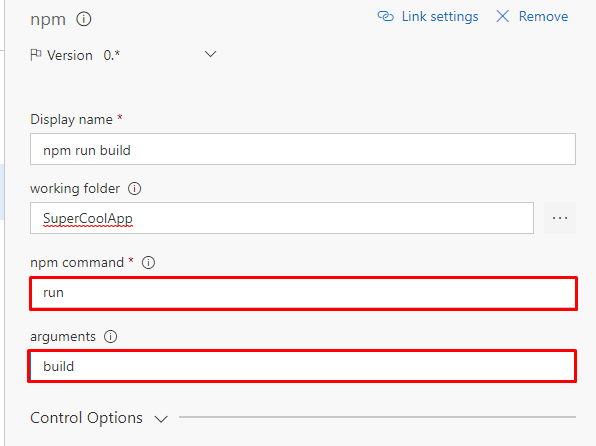
Create the ng build task
Clone the task and update the command as follows
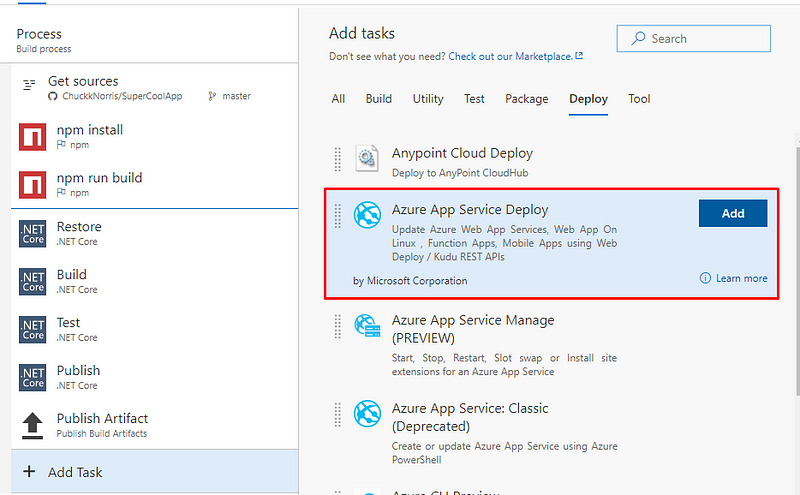
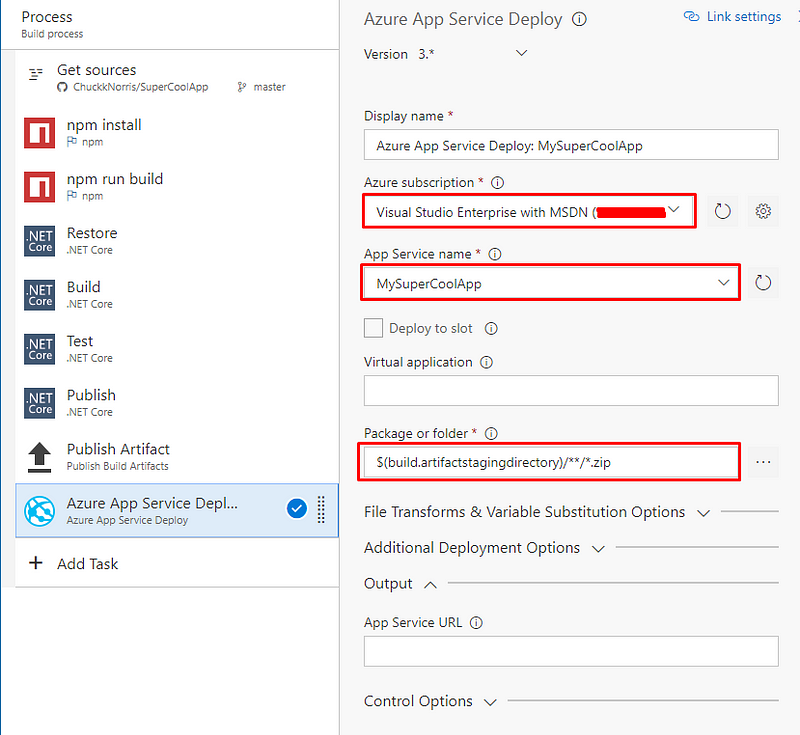
Create the Azure App Service Deploy Task
This task will take your compiled .NET Core application and publish it to your Azure Web App service.
Connect it to your Azure subscription by following the instructions for the Azure subscription field and select your app
Set your package location to the output of the .NET Core: Publish task:
$(build.artifactstagingdirectory)/**/*.zip
Stop the App Service Before the Build Process
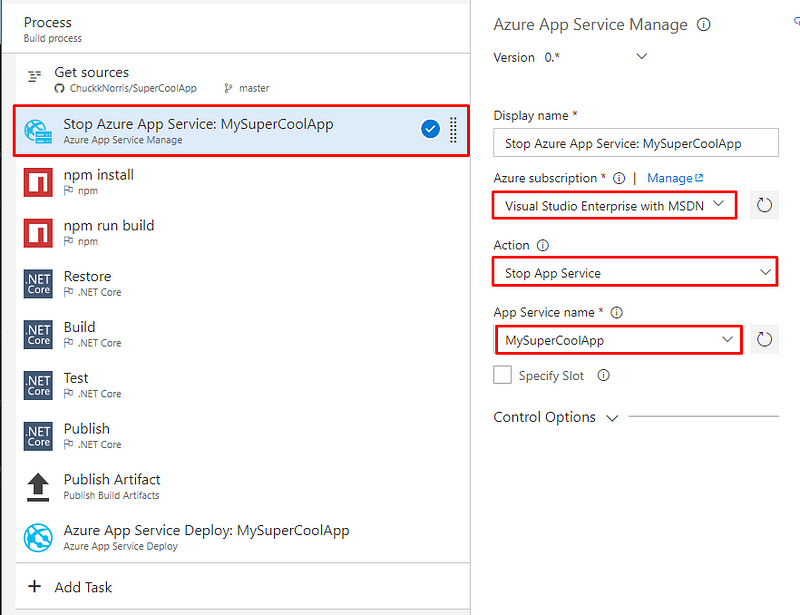
In order to get around a bug where the app service isn’t completely stopped when it reaches the deploy task, we’re going to stop the Web App before the build process starts to ensure it’s completely shutdown.
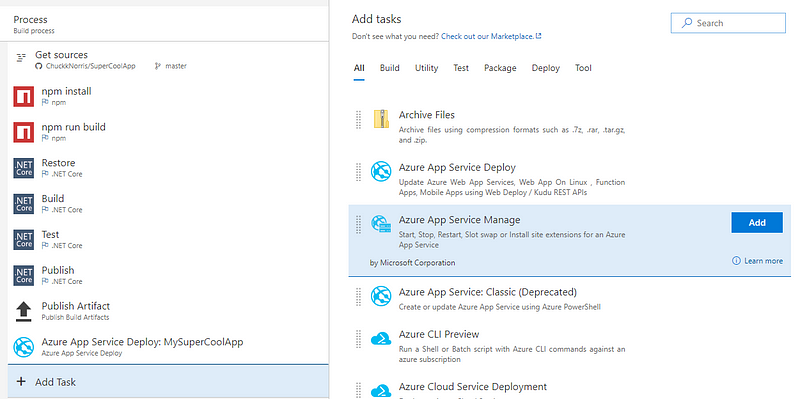
Add the Azure App Service Manage task to the build process
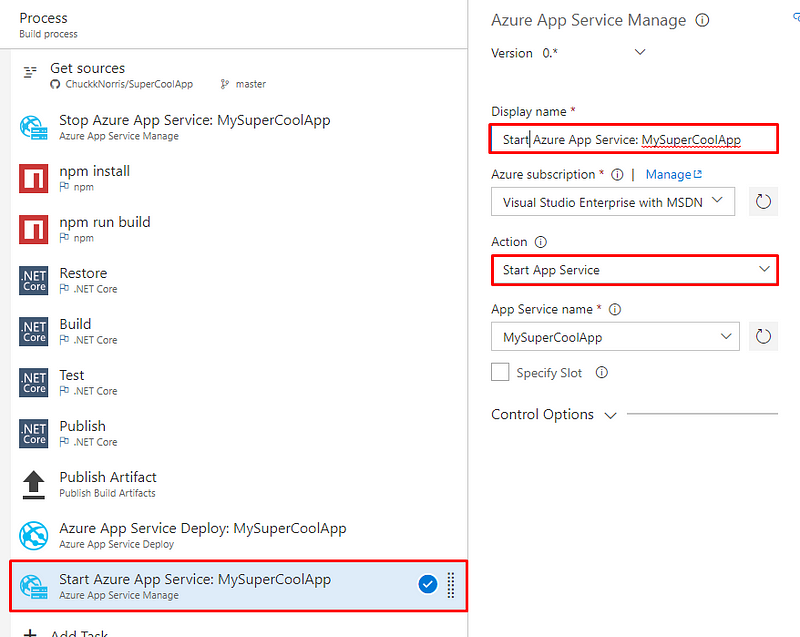
Move the App Service Mange task to before the npm install task and change the Action to Stop App Service
Start the App Service after deployment
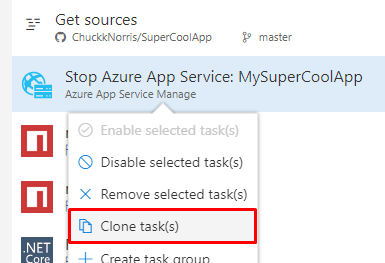
Clone the Stop App Service task
Move it to after the Deploy task and change its name and action to Start App Service
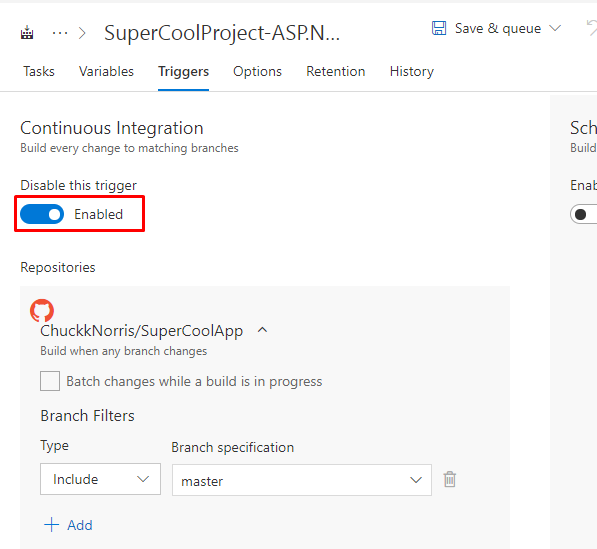
Enable Continuous Integration
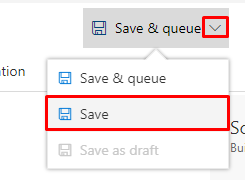
Save the build definition
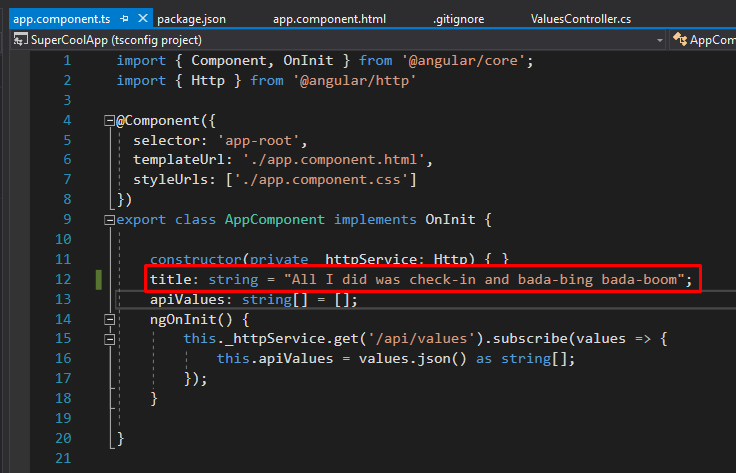
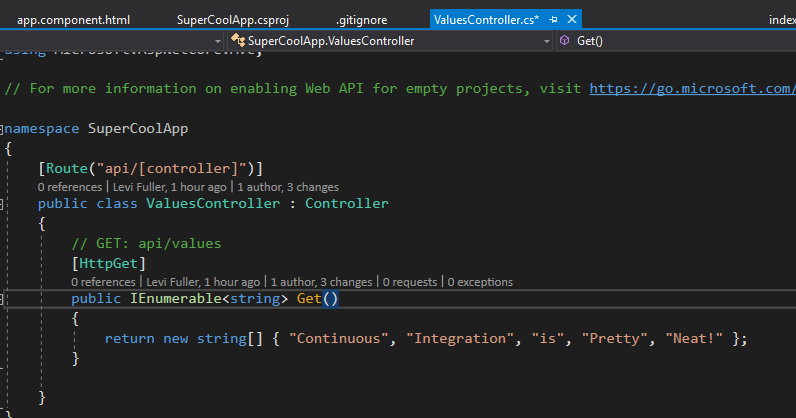
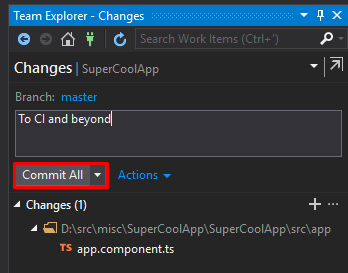
Change some code, commit it, and push it to your repository
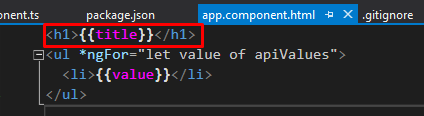
Try adding a variable to your component
Show it in the title
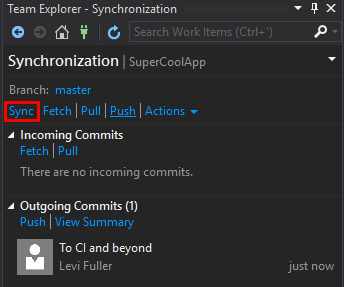
git commit -m "To CI and beyond"
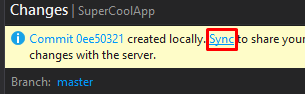
git push
The Sync operation performs a git pull and git push
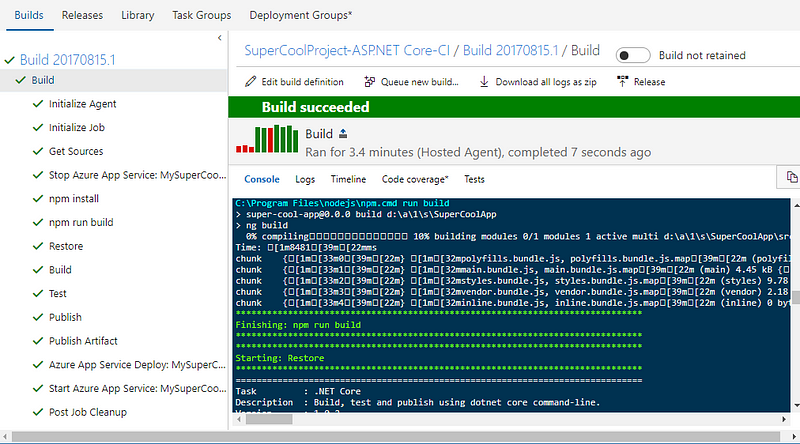
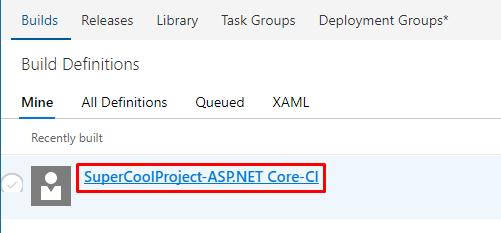
Observe the build
Open the build definition you created
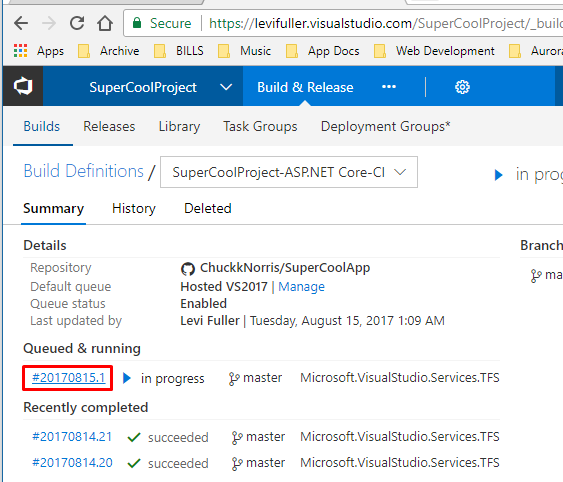
Select the queued build which was triggered by your push
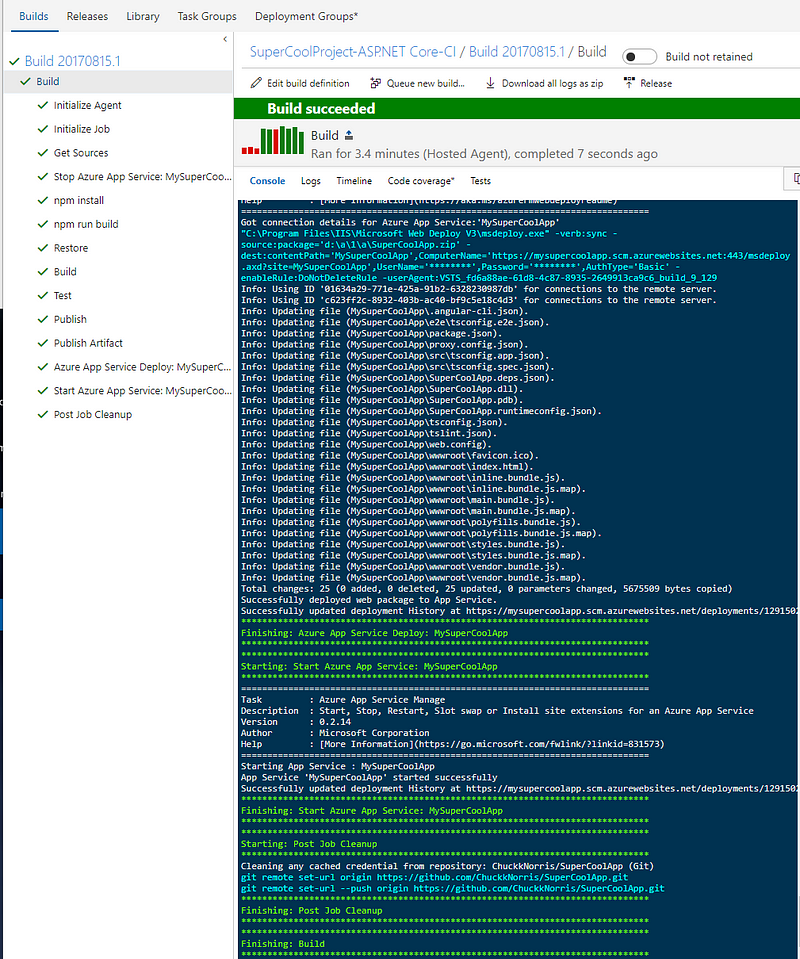
You can view all console output as the build progresses