Most people I know stay away from list definitions... and I did for a while. But now I’m not so scared of them… I came up with an approach that simplifies things. My approach to building them really makes things simpler and easier. This follows the same theme I have for site definitions which I blogged about earlier last year. My take on site definitions can be boiled down to the following:
- Copy Blank Site and give it a new name/ID... this is just a shell... nothing special in it (I like to remove the WSS 3.0 logo from the default page so it really is a Blank Site, not a Not So Blank Site).
- Create Features and associated stapling Features, stapling to the new site def.
- Now you have a site def you can change after creating sites with it (by activating/deactivating stapling Features) and it's easier to build in a modular fashion.
- Create content type(s) - I don't like adding columns to lists... I use content types for everything... and I mean EVERYTHING. Even if it is going to be used in just one list, I still use content types. Create these guys in a Feature for the most portability and reuse.
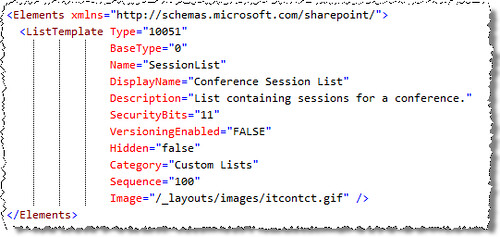
- Create list template in Feature element manifest - Nothing special here... your typical
node like the following: - Create the list template’s schema - Now for the nasty part everyone tries to avoid. Create a subfolder in your Feature with the name of the list. Now you need the list schema… here is where you are going to cheat and save time! Copy the schema.xml file from the OOTB Custom List template found in the Feature CustomList. Put that schema.xml file in your Feature, within the folder you just created. Why use the schema.xml file from CustomList? Great question: because it is the most bare bones schema file out there… it has the absolute minimum stuff in it (ie: fields, content types & views) you need to implement a list. I like starting from it and making a few tweaks.
- Update list schema.xml – The worst part about creating custom list definitions is the schema.xml file. But, if you start from a template, ala CustomList, it’s much easier. Now… make the following edits to schema.xml:
- Change the list schema’s metadata – set the title of the list and it’s URL:

- Add & remove content types – remove all the existing content types listed in the schema and add back just the one(s) you created previously:

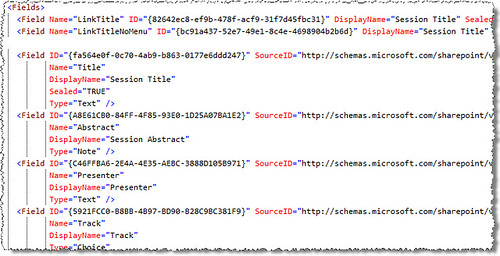
- Add the fields that will be in the list – next, you need to add all the fields that will be in the list… include all the fields on all the content types. Make sure to leave the two LinkTitle and LinkTitleNoMenu alone… those are the special ones we get in lists that hyperlink the list item to get the ECB menu or a link to the list item’s display page:

- Modify the
node for the two default views – for the two default views, search for thenode and add all the fields that should be shown in that view:

- Change the list schema’s metadata – set the title of the list and it’s URL:
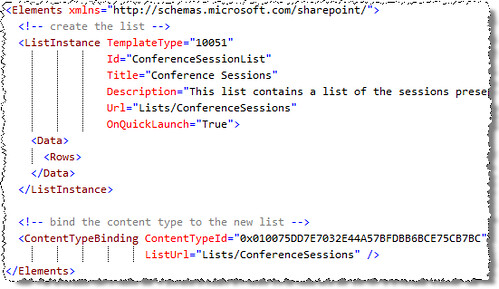
- Now you can deploy it, but when testing I like to create an instance of the list template in the Feature deploying it (you can always remove it before deploying to production). There’s just one little trick when you create an instance of a list and you’re using content types, you need to do two things:
- First, you need to bind the content type to the list instance like this:

- Second, you need to configure the list to enable the use of content types. Unfortunately you have to do this through the API as the Feature schema doesn’t provide this option. Best pace for this: in your FeatureActivated receiver method:

- First, you need to bind the content type to the list instance like this:
Now, to test your view by deleting all instances of the test list, deactivate the Feature and uninstall it… remove all instances of it. Now, try it again. Using this process I’ve been able to create list templates complete with two or three complex views in less than 15 or 20 minutes. Not so bad eh?


No comments:
Post a Comment